How to install sarking in existing tiled roof
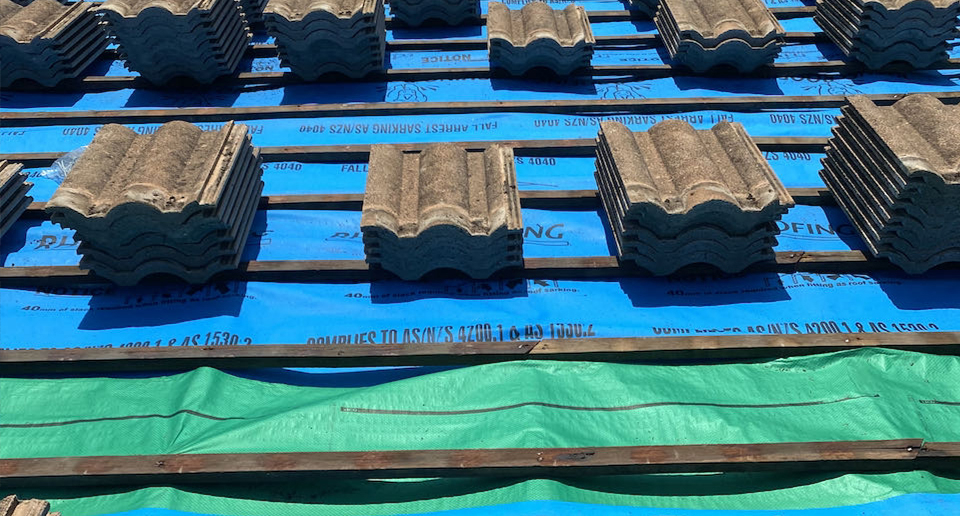
Installing sarking in an existing tiled roof is a tedious job to undertake – it requires skill, precision, and knowledge to get the job done right. Need advice on whether your roof needs sarking installation? You’ve come to the right place!
It’s important to note that working on a roof is dangerous and should only be carried out by roofing professionals who follow safety guidelines, are licenced and insured.
Let’s learn about what needs to be done for us to install sarking effectively and safely underneath your tiles!
Retrofitting Sarking
No Sarking Under Roof Tiles
It’s important to check if there is any existing sarking already in place, if so, your existing sarking may only need partial repairs or replacement.
If there is no sarking under your tiled roof, we recommend installing it to prevent or to solve leaking roofs, this is called retrofitting sarking. For new builds in Australia, sarking must be installed to meet legal requirements.
Sarking should always be installed directly underneath the roof battens before laying new tiles – it should never go beneath the tiles themselves. This is due to moisture getting trapped between the tiles and deteriorating the sarking and underlying support structures over time. For this reason, fitting sarking under a tiled roof is necessary, otherwise water may penetrate through tile gaps created by wind and rain or broken tiles.
Without sarking, dampness could damage interior finishes like plasterboard walls, cornices, or insulation material within cavities in ceiling. Thus, when renovating an old tile roof that doesn’t have any existing sarking installed, it’s essential to do so prior to putting down any new tiles – not doing so risks compromising structural integrity and incurring costly damages down the line.
Installing Sarking Under Tiled Roof
Have you ever wondered how to install sarking in an existing tiled roof? Sarking is a legal requirement for tiled roofs in Australia since 1996, and it’s important to get the job done right.
The first step is to remove all roof tiles from the area where you want to lay down the sarking material. This can be done by removing all cappings, roof tiles and timber battens. Next, sarking is rolled out across the roof trusses from one end of the roof to the other and with a 150mm horizontal lap on each run, this forms a protective water barrier on the roof. You’re now ready for tile installation!
Timber battens and roof tiles are reinstalled along with cappings, storm seal is also installed to all valleys to provide further protection.
Sarking Under or Over Battens?
Sarking can only be installed under battens.
Roof Sarking Installation Cost
The cost of installing sarking varies depending on several factors, including the size of your roof, the type of tiles used and whether any extra materials or labour are required.
On average, most homeowners can expect to pay between $15,000 and can exceed $35,000 plus GST for professional installation. This figure could be higher or lower depending on the specifics of each job. Investing in sarking can save you money thanks to its energy-saving properties!
Scheduling a roof inspection
Installing sarking in an existing tiled roof can be a daunting task. But with the right advice and materials, it doesn’t have to be overwhelming. By taking the above factors into account, hopefully you’ll find that adding sarking to your existing tiled roof isn’t so scary! I liken installing sarking to building a firm foundation for your home – something that requires care and attention but is worth doing when it comes to protecting your property.
Don’t let your roofing problems become bigger! Contact us today to schedule a roof restoration and protect your property from damage. Our team of expert roofers will provide you with a comprehensive and customised solution that will extend the life of your roof and give you peace of mind. Get a free roof restoration quote today!
